

A beautiful paint job is rarely about the final coat, it is about everything that happens before the brush touches the wall. Cracks, dust, grease, and uneven surfaces all show through new color, no matter how expensive the paint is. Dry desert air adds another twist, because paint can set quickly and leave lap marks if the process is rushed. Anyone planning Interior painting in Scottsdale AZ will get better results by following a careful routine, and Top Cut Painting, LLC walks through the steps in the order they should happen.
Choose Your Colors and Finishes Early
Decide on colors before you buy supplies, and test them on the wall itself. Light changes through the day, and sun-filled rooms can make the same shade look warmer or cooler by evening. Paint a large sample patch and watch it in morning and afternoon light. Think about sheen as well, since flat hides flaws but marks easily, while satin and semi-gloss clean up better in kitchens, baths, and hallways.
Gather the Right Tools and Paint
Good tools make clean results easier. You will want quality brushes, roller covers suited to your wall texture, a sturdy roller frame, an extension pole, painter’s tape, drop cloths, and a tray. Cheap supplies shed fibers and leave streaks. Choose a low-odor, low-VOC paint if the home will be occupied during the project, and buy a little extra so touch-ups match later.
Clear and Protect the Room
Move and Cover Furniture
Take out what you can and push the rest to the center, covered with plastic or cloth. Paint spatters travel farther than you expect, so cover items completely.
Protect Floors and Trim
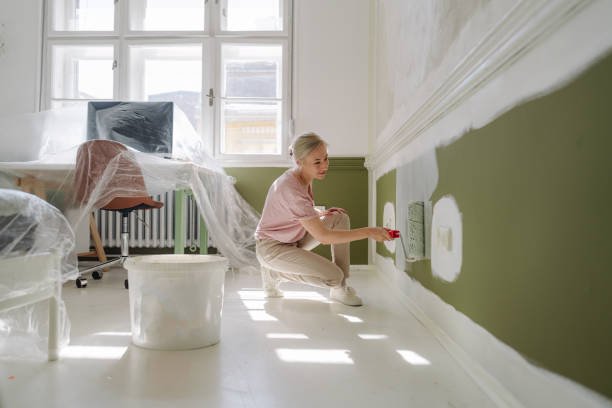
Use canvas drop cloths on floors, since plastic can be slippery and does not absorb drips. Tape along baseboards, window frames, and door casings with a firm press so paint cannot sneak underneath.
Handle Outlets and Fixtures
Turn off power before removing cover plates, and tape over switches that cannot be removed. Remove or cover light fixtures and hardware so your lines stay crisp.
Repair Walls Before You Paint
Walk the room with a bright flashlight held at an angle, which highlights dents, nail holes, and cracks. Fill small holes with spackle, and use mesh tape and joint compound for larger cracks. Desert homes can show settling cracks or texture damage, so look closely near corners and doorframes. A thorough Interior painting in Scottsdale AZ project always includes this step, because fresh paint magnifies flaws rather than hiding them. Let patches dry completely before sanding smooth.
Clean and Sand for Better Adhesion
Dust and grease stop paint from sticking, especially in kitchens and near light switches. Wipe walls with a mild cleaner and a damp cloth, then let them dry. Lightly sand glossy surfaces and rough patches so new paint has something to grip. Vacuum or wipe away the dust afterward, since even a thin layer can leave a gritty finish.
Prime Where It Counts
Primer is not always optional. Use it over patched areas, bare drywall, stains, and dramatic color changes. It evens out absorption and helps the final color look consistent. If you are covering a dark wall with something light, a tinted primer can save you extra coats. Skipping primer on repairs often leaves dull spots called flashing that show up in the light. A careful Interior painting in Scottsdale AZ job gives every repair this attention.
Cut In and Roll With a Steady Rhythm
Start by cutting in, which means brushing a clean edge along ceilings, corners, and trim. Then roll the open wall right away while the edges are still wet, working in sections of a few feet with a light overlapping W pattern. In dry climates, keeping a wet edge matters even more, so avoid long breaks mid-wall. Keep the room from becoming too hot, close windows if hot wind or dust is blowing, and use fans gently to circulate air without blowing debris.
Let It Dry and Add Finishing Touches
Follow the recoat time on the can, even if the wall seems dry to the touch. Apply a second coat for deeper color and better coverage. Remove tape while the last coat is slightly tacky, pulling slowly at an angle to keep lines sharp. Touch up any misses, then clean brushes right away and reinstall outlet covers and fixtures. Let the room air out before moving furniture back.
Final Thoughts
Great paint jobs come from patience, preparation, and attention to detail. Take your time with each step and ask questions when something does not look right. When you are ready to talk with a dependable Interior painting in Scottsdale AZ, bring your color ideas and your timeline.
Frequently Asked Questions
How long should I wait between coats of paint?
Check the label on your paint, because recoat times vary by product, temperature, and humidity. Dry desert air may make the surface feel ready sooner, but the paint may still be curing underneath. Waiting the recommended time helps prevent peeling and uneven color.
Do I always need primer before painting?
Not always, but it is recommended over bare drywall, patched spots, stains, and major color changes. Some paints include primer, though they may not replace a dedicated product in tough situations. Ask your paint store which option suits your walls.
What sheen works best for a living room?
Many people choose eggshell or matte finishes for living areas because they look soft and hide small imperfections. Higher sheens are easier to wipe clean but show flaws more. Think about how the room is used and how much light it receives.
How can I prevent lap marks on my walls?
Keep a wet edge by working in manageable sections and rolling continuously from one area into the next. Use quality paint and a good roller cover, and avoid stopping in the middle of a wall. Planning your breaks at corners or trim lines helps hide any overlap.