

Introduction
You have invested in a ZSK embroidery machine. These German-engineered workhorses are known for their precision, durability, and ability to handle complex designs that would choke lesser machines . But here is the uncomfortable truth: even the most advanced hardware is completely useless without the right file. You cannot just load a JPEG and hit go.
The process of getting your artwork ready for production is called digitizing, and it is the bridge between your creative vision and the physical thread. When we talk about Design Conversion for ZSK Embroidery Machines, we are talking about translating a flat image into a detailed set of stitch commands that your machine can execute flawlessly. This involves understanding specific file formats, choosing the right software, and making technical adjustments that prevent thread breaks and distortion. Let us break it down so you can stop fighting with your machine and start creating.
The Fundamental Problem: Images vs. Stitch Data
This is the single biggest misunderstanding in embroidery. Your ZSK machine cannot read image files like JPEGs, PNGs, or SVGs. These formats only contain color and pixel information. They tell your screen what to display, but they tell your needle absolutely nothing about where to go or how to move .
Your machine reads embroidery files that contain stitch data. These files include the coordinates for every single stitch, the stitch type, the direction, the density, and even commands like thread trimming and color changes. Without this data, your machine has no idea what to do. You could feed it the most beautiful logo in the world, and all you will get is an error message or a tangled mess of thread .
Understanding ZSK File Formats
ZSK machines work best with specific native file formats. The most common you will encounter are .Z00 and DSZ (which stands for ZSK’s own format) . These files are specifically optimized for ZSK hardware. They ensure that all the machine commands, like presser foot height and automatic head changes on multi-head systems, are properly encoded . If you are using combination machines that handle chenille or sequins, you might also work with the newer ZSK TC file format, which supports those specialized attachments .
There is also the T05 format, which is a Wilcom ZSK variation, and various .Z?? extensions that correspond to different ZSK machine types . However, you do not need to memorize them all. The key takeaway is that you need to export your final design specifically for ZSK.
It is also important to distinguish between machine-readable and editable formats. Formats like .Z00 and .DST are machine-readable. They are what you send to the machine for production. Formats like .EMB (used by Wilcom) are editable files. You use them within your digitizing software to build and adjust the design before exporting it to a machine format .
The Digitizing Process: Step by Step
Now that you understand the stakes, let us walk through the actual workflow for converting your artwork.
Step 1: Start with Clean Artwork
The process always begins with the quality of your source material. A high-resolution vector file (like AI, EPS, or SVG) is ideal because it scales without losing clarity. If you only have a JPEG or PNG, ensure it is clear, high-resolution, and free from distracting background elements .
Step 2: Choose Your Digitizing Software
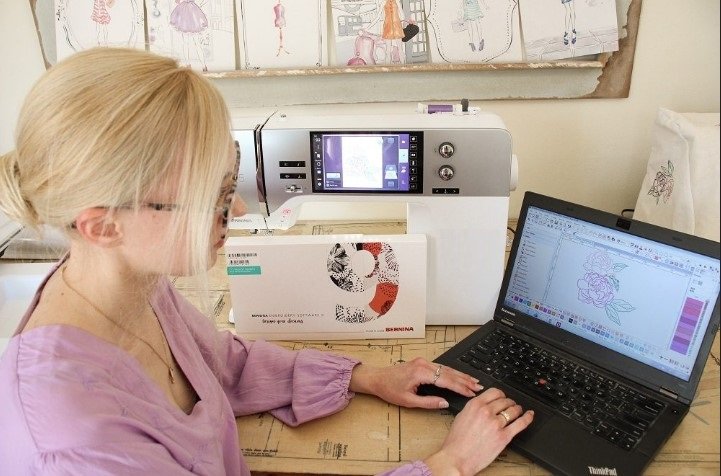
You need professional software to create the stitch data. The good news is that ZSK offers its own solution called BasePac 10, which is developed in cooperation with software architects specifically for their machines. It comes in different packages depending on your needs: Base for editing existing designs, Premium for digitizing from images, Professional for complex designs and effects, and Technology for technical embroidery and fiber laying .
Other industry-standard options include Wilcom EmbroideryStudio, Hatch, and Pulse . BasePac offers features like automatic conversion of image files to vector graphics, over 100 pre-installed fonts, and even a patented Braille function for specialized work . Whichever software you choose, ensure it supports output in ZSK formats.
Step 3: Digitize the Design
This is where you translate the artwork into stitches. You trace the outlines of your design and assign specific stitch types to each section. You will typically use a satin stitch for text and borders, a fill stitch for large solid areas, and a running stitch for fine outlines . BasePac includes tools for automatic distance adaptation, curved stitch directions, and intensity gradients to give your designs a professional finish .
Step 4: Adjust for ZSK Standards
This is the critical fine-tuning phase. You must adjust the density (how closely packed the stitches are) to prevent thread breaks. You need to add underlay (a foundation layer) to stabilize the fabric. And you must apply pull compensation to account for the fabric stretching as you sew. Without these adjustments, your logo will warp or pucker .
Step 5: Export into Machine Format
Once you are satisfied with the design, you export it as a ZSK-readable file. Choose .Z00, .DST (a universal Tajima format that also works), or DSZ . This step converts your editable work into a production-ready file.
Step 6: Test and Optimize
Before running a full production batch, always test the design on your ZSK machine. A test stitch-out will reveal any small flaws that you missed on screen. For models like the SPRINT and RACER series, optimizing stitch sequencing is especially important for efficiency and reducing trim counts .
The Smart Alternative: Professional Services
Let us be honest. Mastering digitizing software takes time. If you are a business owner or someone who values their time, hiring a professional digitizing service is often the most practical choice . Professional digitizers have years of experience with different fabrics and stitch types. They understand the nuances of ZSK machines and can create flawless files that stitch out perfectly the first time. The process is simple: you send them your logo, and they send back a machine-ready ZSK file.
Conclusion
Design conversion for ZSK embroidery machines is not just about pressing a button. It is a deliberate process that turns your artwork into a language your machine can speak. You need clean artwork, the right digitizing software, and an understanding of file formats like .Z00 and DSZ. Whether you choose to learn the craft or hire a professional, the goal is the same: to create a design that stitches out cleanly, looks professional, and does justice to your ZSK machine’s engineering. Your machine is built for precision. Give it the files it deserves.